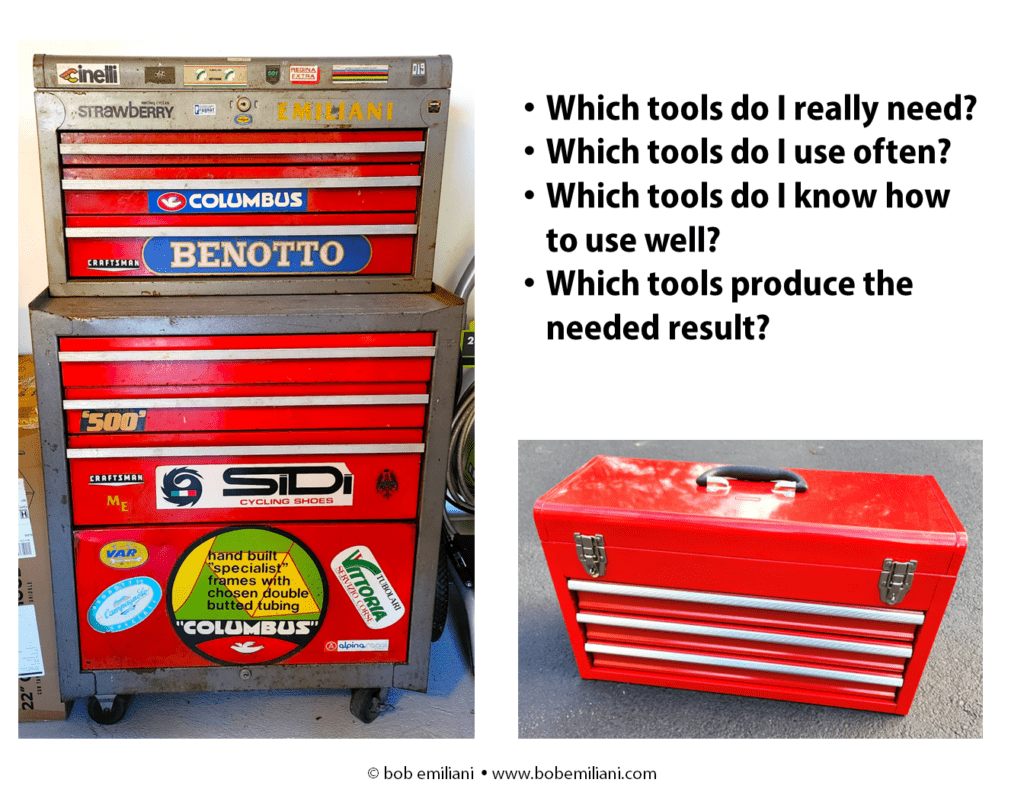
Recently, I sold my Sears Craftsman tool chest, which I bought 47 years ago, and in doing so I downsized my collection of tools. To do that, I asked myself these questions:
🛠 Which tools do I really need?
🛠 Which tools do I use often?
🛠 Which tools do I know how to use well?
🛠 Which tools produce the needed results?
It turned out that I need only about 15% of the tools in my tool chest, and they now fit in a small portable tool box (the leftover tools, also purchased decades ago, went with the buyer of the tool chest who was impressed that all the old tools were made in America).
In Lean world, there are a lot of tools, and people collect these tools even though many of them go unused or are poorly used. Consequently, results are often less than what one hopes to achieve. So ask yourself the same questions about the Lean tools that you use:

Then ask yourself a related question: What am I missing that could improve people’s learning outcomes and achieve better bottom line business results? Here’s a hint.
The Tool Chest Backstory
Why did I need a big tool chest? As you can see from the many stickers on the tool chest, I was deeply involved in cycling for decades. In the nine months before building my first frame, I designed and built three framebuilding jigs (fork, rear triangle, and main tubes) in my high school metal shop class. It involved machining steel angle iron and casting and machining aluminum blocks to hold the tubes in place.
At the age of 17, I designed a racing bicycle frame to my body dimensions. Framebuilder Richard Sachs, then of Deep River, Connecticut, provided some helpful technical advice on front fork design via mail correspondence. Some months later, I built my first frame at the age of 18.
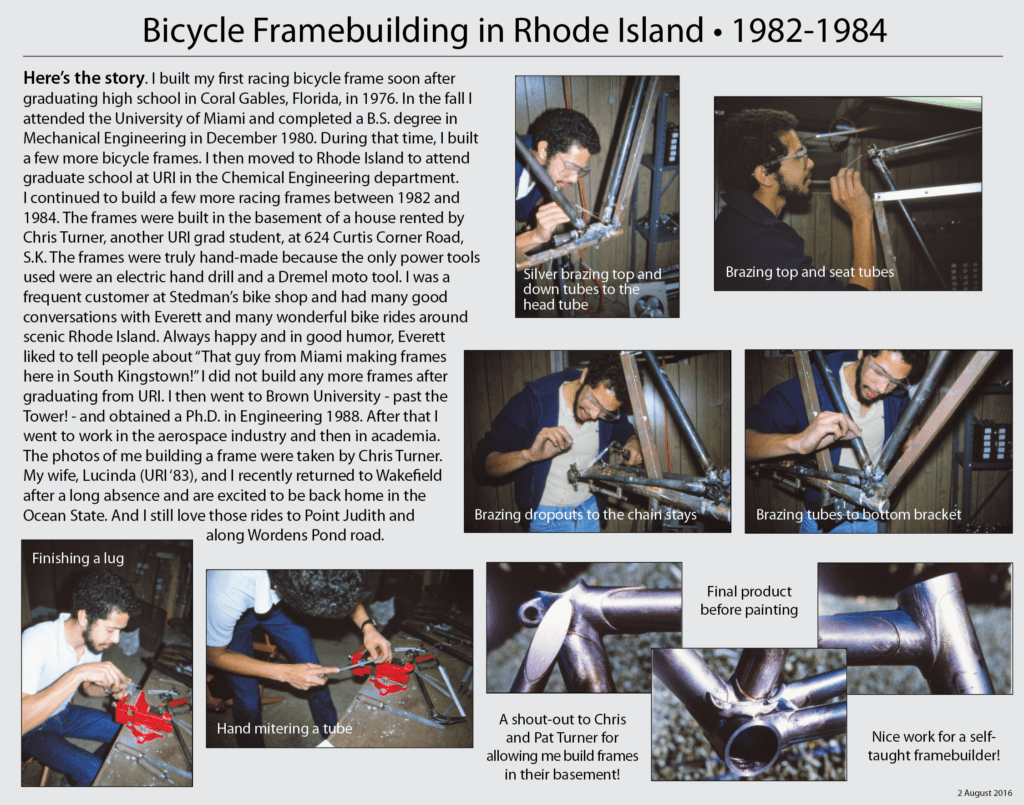
The poster below tells some of the story. I created it for a local bike shop, Stedman’s Bike Shop. My framebuilding work in the early 1980s was a novelty and I was sort-of locally famous among cyclists — not every kid builds bicycle frames, especially ones that look professionally made!

Prior to bikes, I worked at a camera shop (since the age of 13). I sold my camera and darkroom equipment to pay the startup expenses for framebuilding; i.e., tubes and detail parts, oxy acetylene torch, tool chest, bench vise, files, etc. My father kicked in some money for consumables such as sandpaper (which I needed a lot to do finishing operation on hand-mitered tubes and to get the angles right), drill bits, a set of C-clamps, soft-face hammer, etc.
Overall, I had limited money, limited equipment, and limited resources — but I had unlimited ideas and unlimited creativity! To build these frames, I had to have a kaizen mind — spend ideas, not money, to achieve the goal of building racing bicycle frames.
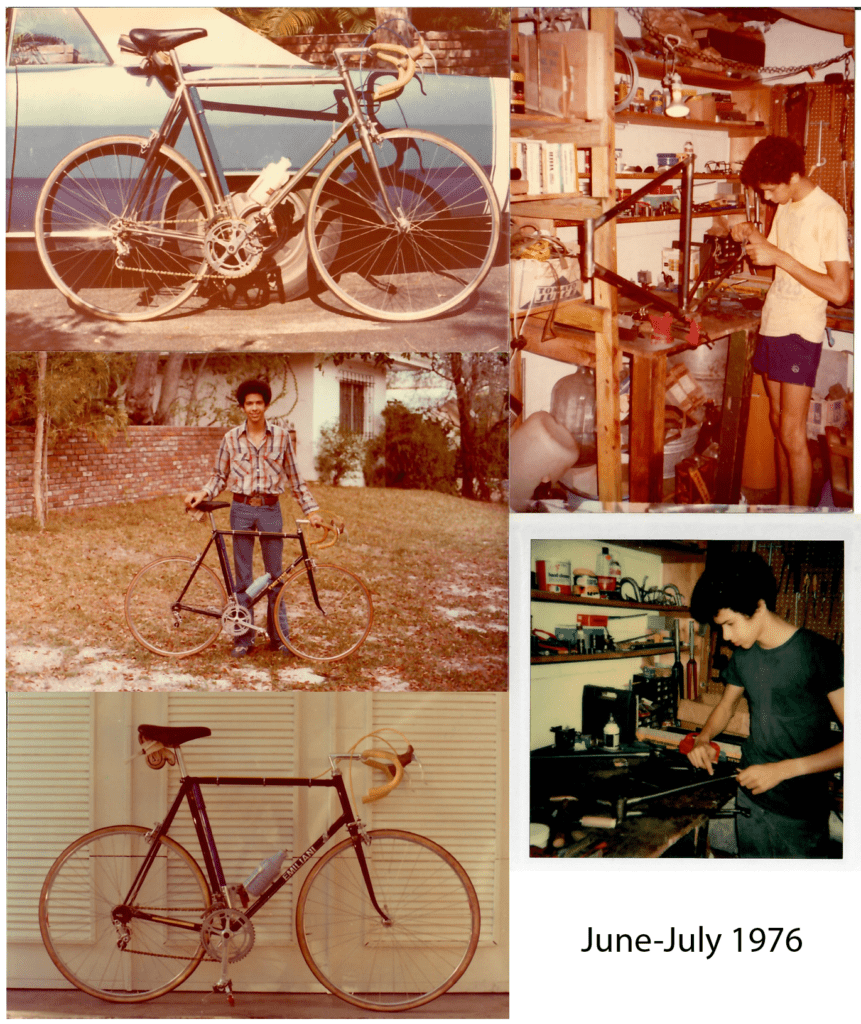
Below are a few images of my framebuilding work in the summer of 1976. The photo at the top left shows frame #1, which I rode unpainted for a month or two — with greased tubes so they would not rust in the South Florida humidity! The two photos below show the frame, painted deep purple, by the folks at Strawberry Racing Cycles in Portland Oregon. See more below…

I had to be really creative because I did not have much to work with. Only two power tools, an electric hand drill and a Dremel Moto-Tool. The rest of my tools were hand tools: hacksaw, files, scribe, tube cutter, C-clamps, hammer, tape measure, ruler, etc. Unlike most framebuilders, I did not have the usual tools: lathe, milling machine, drill press, jig bore, belt sander, band saw, etc. And I did it all in a small area of 100 square feet. It was great fun!
The mylar decals of my name were made by a one-man screen printing shop in Miami, in Copperplate font. I think I paid $50 for 100 decals, which was a lot of money back then.
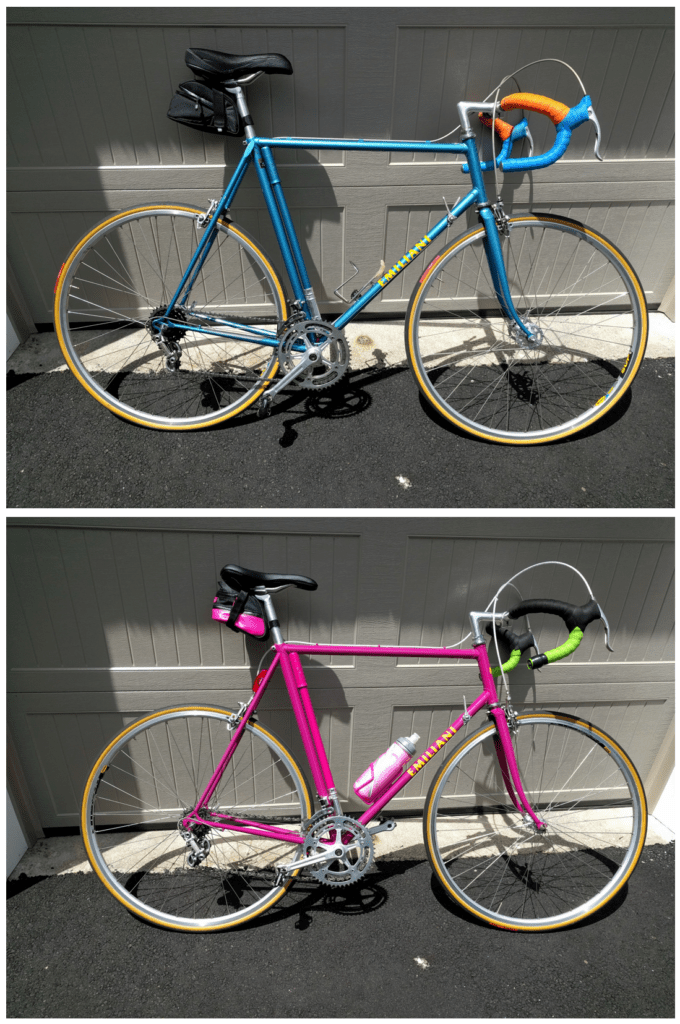
Below are what is left of my efforts: frame number 3 (1977), top, and frame number 8 (1983), bottom. Panther pink was a really wild color choice for a guy to paint his bike frame back in 1983! Both these bikes are equipped with vintage 1970s-1980s Campagnolo Record and Super Record components.

